Knowing how to set up a top-rope climbing belay system takes some skill and practice, but the right approach makes for less guesswork and encourages confidence when it matters most. Properly guiding a beginner or climbing with friends using the correct descenders, knots, and checks will guarantee safety from the first move to the very last. Let’s go through the complete setup procedure together, step by step.
Understanding the Belay Equipment You’ll Need
Before packing your gear, it should be arranged and organized. A top-rope climbing belay safely requires the right gear, along with planning in advance.
The list below outlines minimum safety standards.
- Climbing Rope – must be dynamic, and sufficiently long for the route and descent.
- Harnesses – one for each the belayer and the climber
- Carabiners – should be locking types
- Belay Device – assisted-braking descend devices or tube-style devices, Anchor System – slings, cordelette, or pre-built static anchor.
- Helmet – safety for both climber and belayer
- Optional – personal anchors (PAS), extra belay equipment, or belay gloves
Where repairs and maintenance are needed, ensure they are done; descenders that stick, rusted carabiners, and worn-out ropes all require replacement before attempting to stand on solid ground.
Setting Up the Rope at the Anchor
A proper top-rope system starts with a bombproof anchor at the top of your climb. You may build one using bolts, natural features, or a combination of both.
Here’s the basic process:
- Build a redundant, equalized anchor using two or more solid points.
- Use a cordelette or sling to tie a master point with a figure-eight-on-a-bight or overhand knot.
- Clip a locking carabiner into the master point and thread the rope through it. This is where the rope will run while the climber ascends.
Make sure the master point sits over the edge so the climbing rope runs freely down the face without rubbing over the rock.
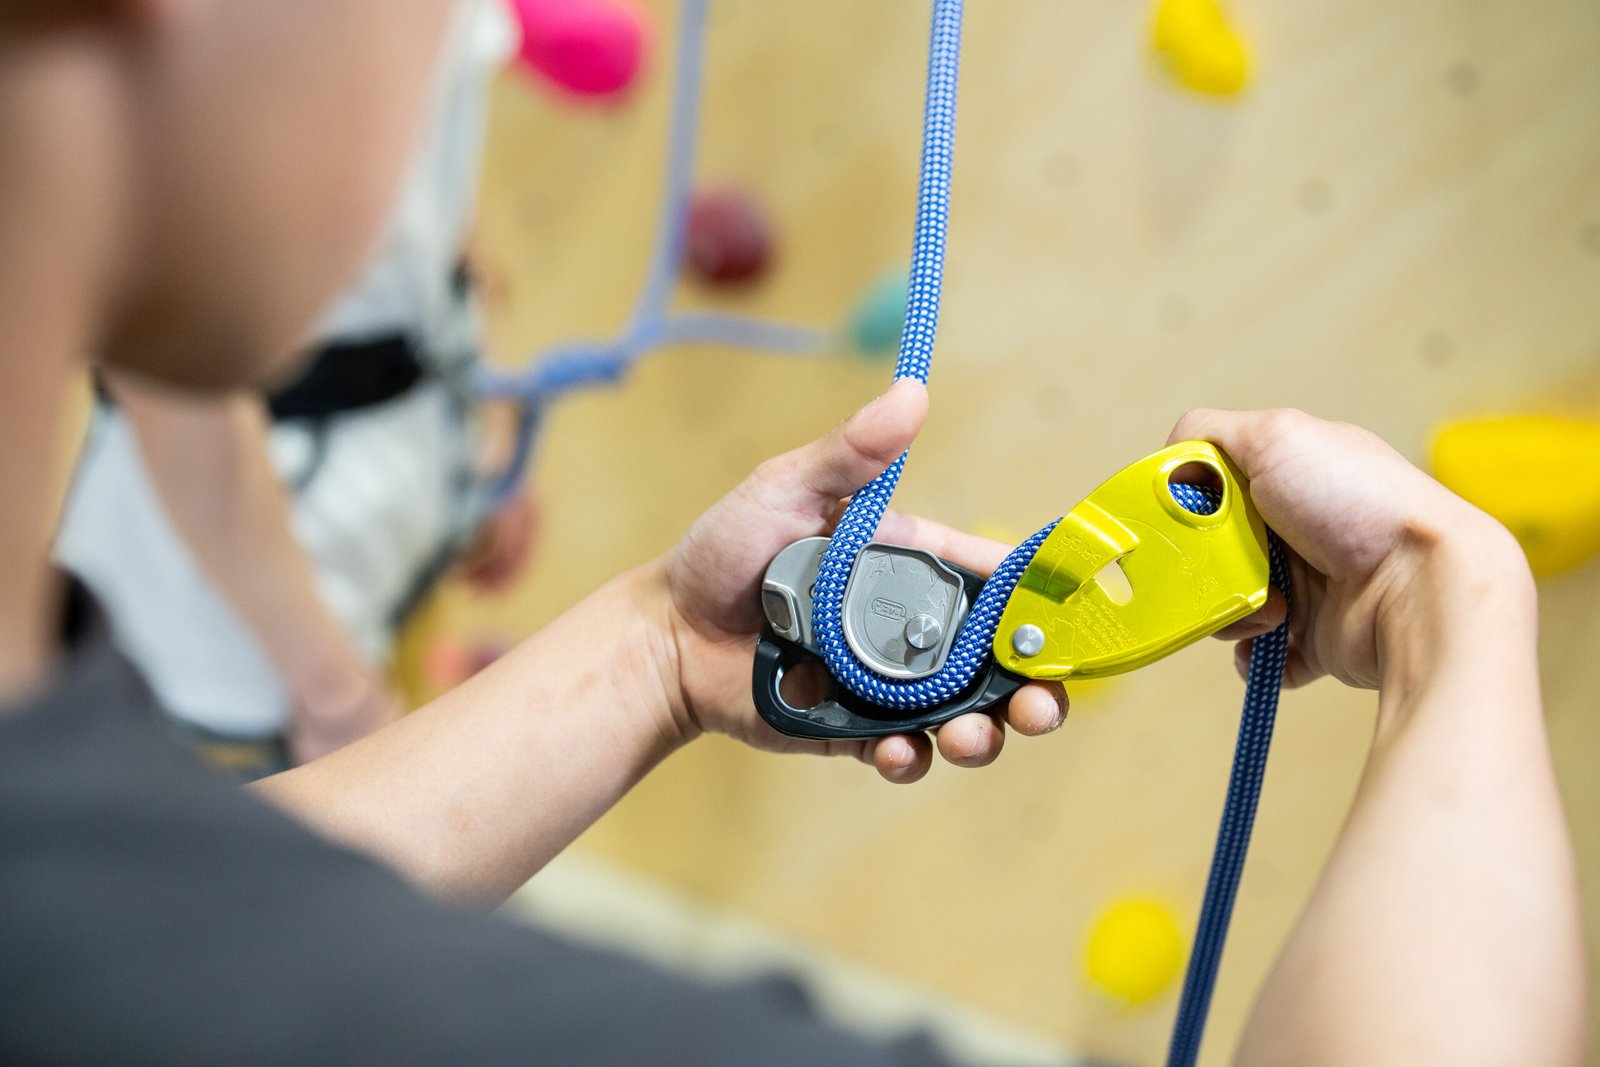
Attaching the Belay Device (Descender) Properly
After you manage and anchor the rope, it’s time to set up the part of your system that involves your belay device. When setting up your belay for a top-rope climbing session, make sure your descenders can support effortless rope handling while ensuring proper braking.
Actions to be performed:
- Determine the braking and climber sides of the rope.
- Guide the rope through your belay system by following the marked instruction maps of the system.
- Secure the belay device to the belay loop on your harness with a locking carabiner.
- Conduct a brake test prior to climber activity by pulling the brake strand and checking resistance.
If the descenders are assisted braking, the user should be familiar with their locking mechanisms. Never assume it will lock on its own without the aid of hands in the right position.
Double-Check the Harness and Safety Systems
Before a single foot leaves the ground, both the climber and belayer must do a full safety check. It takes 30 seconds and can prevent serious accidents.
Key points to check:
- Are both climber and belayer harnesses snug and double-backed?
- Is the climber tied in with a figure-eight follow-through and backed up?
- Is the belay equipment properly threaded and locked in?
- Are helmets on and adjusted?
- Is communication clear? (Use verbal checks like “On belay?” / “Belay on.”)
This step should never be skipped. Even experienced climbers make mistakes—get in the habit of checking every single time.
Belaying Technique for Top-Rope Climbing
The basics of climbing belay technique remain the same, but good habits go a long way in keeping things smooth and safe.
Here’s what to focus on:
- Keep your brake hand on the rope at all times. No exceptions.
- Use the PBUS method: Pull, Brake, Under, Slide.
- Stay in a ready stance—knees slightly bent, paying attention to the climber’s movements.
- Communicate clearly: give slack when requested, take in when needed, and always confirm commands like “Climbing” or “Take.”
If you’re belaying for a beginner, stay extra alert and coach them through the commands.
Lowering the Climber Safely with Descenders
After the climber has either reached the top of the climb or made the decision to come down, it is time to use your descenders to lower them.
Steps:
- Confirm readiness: “All clear to lower?” “Lower away!”
- Make sure your brake hand maintains grip on the rope.
- Gradually reduce the rope in a controlled manner, smoothly paying out the rope and adjusting the speed through the belay device.
- Ensure that the climber is kept upright while being lowered and their feet are appropriately guided down the rock.
- Be vigilant for ledges, branches, or even overhangs.
Different descenders have different amounts of friction. New users to a particular device should attempt to familiarize themselves with the rate of descent on level ground first.
Common Mistakes to Avoid with Climbing Belay Systems
Even with good gear, things can go wrong due to small oversights. Here are a few common (and preventable) mistakes:
- The belayer gets distracted and removes the brake hand from the rope.
- The belay device is threaded backward or locked incorrectly.
- The anchor isn’t redundant or shifts under load.
- The brake hand is too close to the device, risking rope burns.
- Belay equipment isn’t compatible with the rope diameter.
Slow down, double-check everything, and avoid shortcuts. Most accidents stem from preventable human error.
Additional Tips for a Safer, Smoother Climb
- Always employ locking carabiners at critical points.
- Pre-test your descenders and belay devices on ground routes before committing to them.
- Lowering and catch fall techniques must be practiced in controlled environments beforehand.
- Always carry with you on longer routes a mini kit for anchor management, a whistle, and a knife.
- Always do a dry run with new climbing partners to check communication and systems together.
Experience is invaluable, but good practices, solid equipment, and clear thinking matter just as much.
Conclusion: Build Trust, Not Just Anchors
Top-rope climbing belay systems are simple, but like everything in safety, they require care to ensure all parts function together. Every step, including threading your descenders properly, slack management, and safe lowering of the climbers, is crucial. With proper understanding of the equipment and an established climbing routine, safety increases as performance improves.
Climbing is built on trust between you, your partner, and your gear, which is why a system check and a double-check pre-climb are necessary to safely enjoy a well-prepared wall course for a surprise route.